Game widow (talk | contribs) No edit summary |
Game widow (talk | contribs) No edit summary |
||
| Line 21: | Line 21: | ||
}} |
}} |
||
| − | '''Forbidden Legend''' is one of the quests in ''[[ |
+ | '''Forbidden Legend''' is one of the quests in ''[[The Elder Scrolls V: Skyrim]]''. |
== Walkthrough == |
== Walkthrough == |
||
Latest revision as of 12:43, 16 April 2020
Forbidden Legend is one of the quests in The Elder Scrolls V: Skyrim.
Walkthrough[ | ]
This quest can begin by finding and reading a copy of Lost Legends, or the Ancient Edict in Reachwater Rock, or simply finding Daynas Valen's abandoned camp and reading his notes.
Investigate the cryptic message[ | ]
This quest stage only appears if the Dragonborn finds the Ancient Edict first.
Investigate the Gauldur legend[ | ]
If you read Lost Legends then the map will be updated with the location of Folgunthur ruins. As well there will be an objective marker near the ruins which will read "Investigate the Gauldur legend."
Travel to the objective marker. This is Daynas Valen's camp. Find his journal and read it.
You will then be given a new objective: "Learn the truth from Daynas Valen"
Learn the truth from Daynas Valen[ | ]
Once in Folgunthur the Dragonborn will fight through Draugr to get to the upper level.
Once there the Dragonborn will find Daynas Valen dead and receive his "Notes" and this will prompt the next objective.
Note: If you are using Flames then fighting the Draugr on the lower level will be easy(ier). There is oil on the ground which you can use to your advantage.
Read Daynas Valen's notes[ | ]
When the Dragonborn reads Daynass' notes we learn about the legend and why the Gauldur name was to struck from record.
The objectives will update, and the Dragonborn can take Daynass' items. Items received include the Ivory Dragon Claw, which is used to gain access to areas upcoming.
Find the Gauldur Amulet Fragment in Folgunthur[ | ]
There are a few puzzles the Dragonborn has to complete to continue. The Ivory Dragon Claw is used for most.
The first of these is the draw bridge next to where we find Daynas. Cross the bridge and fight through the catacombs to the next puzzle. Note: When you first cross the bridge there is a rigged chest with some potions inside.
The second puzzle involves four levers and two iron gates. Try lifting the levels in order of Closest on right, Closest on left, Farthest on Left. Note: This is how it worked for me, I do not know if it will differ for others.
Proceed down the stairs and to the right at the cave in. Watch for the falling rocks. There is a Draugr archer at the bottom, kill it and go through the wooden door.
In this room there are two Draugr seated on either side of a bookcase, and a lever next to each seat. There is a grate over the stairs that lead down. The chain is on the other end of the room from where the Draugr were seated. Do not pull the chain. The Dragonborn will have to access the side rooms to proceed. Access the rooms by lifting the lever by the seat. The door on the left has a few more Draugr as well as movable pillars. There is a petty soul gem that will shock you in this room as well. To understand the pattern mimic the pattern in the other room. But here it is: Facing door - Snake, Middle - Whale, Facing away from door - Hawk. Now the chain can be pulled.
Down the stairs there is a tunnel which may have some Frostbite Spiders. GO through the Iron Door at the end. Once inside the lights will go out and six Draugr will attack. Kill them and the lights turn back on. Proceed to the door. The code for the rings is on the Ivory Dragon Claw. But here it is: Top - Hawk, Middle - Hawk, Bottom - Dragon.
- If you input the wrong code, you get burned.
Proceed to Folgunthur crypt.
Once inside Dragonborn will fight the youngest brother of the Gauldur family: Mikrul. Besides Mikrul there will be Draugr Thrall's. Once Mikrul is defeated he has a Gauldur Blackblade that is enchanted to absorb ten points of health. Also the first part of the Gauldur Amulet, potions, and a Writ of sealing.
Proceed south to a gate which can be opened with the Ivory Dragon Claw. In this next room there is a Word Wall which gives the Dragonborn "Frost". Spend a Dragon soul and have Winter Breath, "Your breath is winter, you Thu'um a blizzard." Also in this room is a chest with some really good loot. Also a Dwarven Sheild is hanging on the chest. One of the items in the chest is "Meridia's Beacon" which begins the quest: "The Break of Dawn"
Proceed to the door on the other side of the room back to Folgunthur.
This takes the Dragonborn through a small cave tunnel to the back of a Sarcophagus. Go through and we are now back near where we found Daynas.
Find the Gauldur Amulet Fragment in Geirmund's Hall[ | ]
This Ruin is near Ivarstead. If you have been there before you can fast travel there and then proceed east to the Ruins.
The Ruins are on an Island, so you will have to swim it.
Once inside there will be a Skeever that attacks (oh no!) Then there is a hole to fall into. Once at the bottom of the hole, if you can go a long time under water there is a chest with some money items.
Go through the iron door, and kill the Frostbite spiders.
Continue through watching out for food fall traps and rigged chests.
You come to a set of stairs and there are carvings on the walls. These are the code for the pillars in the next room. Pretty self explanatory, follow the pattern of whats on the left and right. Then open the gate via the lever.
- If you go for the Lesser Soul Gem watch out for the Mammoth skull.
Proceed to the next area and fight through the Draugr. This is where we find the Altar of Archmage Geirmund. Take the key, it unlocks the door behind you. Before entering that door, If you desire a couple of interesting objects, you should jump into the "inaccessible" iron door that has a broken bridge to the left of the Altar. (Necklace of Disease Immunity, Master Robes of Illusion, Dwarven Bracers of Sure Grip)
In the next room there is an Enchantment Table and a dead end to the right. Go to the left and ascend to the upper level. Once there do not pull the lever on the floor but rather the one behind you on the wall. On the pillar there is a lever for the other half of the bridge. Kill the Draugr here and proceed through the swinging blades (Whirlwind Sprint helps) and pull the chain on the other side to stop the blades.
Next we battle Sigdis, the middle brother and slayer of Geirmund.
Sigdis is a Mage and splits into three of himself and warps around the room when the battle starts. You need only to kill one of the three copies, but make sure you attack the same one each time. He has his own Writ of Sealing, a part of the Amulet, and the Gauldur Blackbow which aborbs fifteen points of Magicka. A door opens behind Sigdiss' crypt once he is dead.
Down this tunnel is another loot chest. There are Pearl's on the groud next to the chest. Continue up the tunnel and pull the lever to exit back in the first area. Next to the hole we jumped in to start this part of the quest.
Find the Gauldur Amulet Fragment in Saarthal[ | ]
To complete this part of the quest it is easiest to do both the "Under Saarthal" quest and this at the same time.
Once the Dragonborn has completed the first part of "Under Saarthal" the objective "Find the danger within Saarthal" appears. This leads you to find the entrance to Saarthal.
Pass through the crypt in front of the altar where you receive the vision and continue to the gate. Tolfdir will tell you to be careful and will follow you into the next room. Cross the bridge and kill the Draugr here and Tolfdir will tell you to find out what is going on. This is when the new objective appears. Pull both chains to open the doors and continue on. Tolfdir will elect to stay back and inspect the coffins.
Now we are in Saarthal. Follow the tunnel and take out any Draugr that get in your way. Ascend the stairs, on the right (it's kinda dark), and go left. Here is a loot chest and a Iron Dagger in the coffin. Ahead is an iron door which leads to an altar, with potions. Go around to the left down the stairs. Ahead is another chest and go quickly because there is a bolt trap at the bottom of the stairs. Go left and we enter a long hall with a lever at the far end.
To activate the lever you must get the pillars in the right order. The symbol behind the pillar is what the pillar should be. But here it is: (numerical from left to right farthest from lever to closest.) 1- Hawk, 2- Whale, 3- Snake, 4- Hawk, 5- Whale, 6- Hawk. Open the gate and continue. We enter a large room and here (I fought) a Draugr Scourge. Ascend the pillar, either stair works, and pass through the iron door. Ahead is a chest, go right to continue. There are two lightening wards on the floor, take them out and the Dragonborn will be free to pass. Ahead is another pillar puzzle. This one is tricky. The correct pattern is in the room behind the pillars. The only problem is some pillars make others move at the same time. Play with the combination until it is right. (I do not remember how I got it to work, sorry.) Pull the level and continue.
At the bottom of the stairs is a hall that goes to the left. There is a bolt trap stone on the floor in the first room. At the end turn right and down the stairs is a blue spinning ball surrounded by a force field... oh and Tolfdir comes up to at the point. Descend the stairs and there is Jyrik sitting at a burial altar. Along with Tolfdir and any other companions take out Jyrik. He yields a Writ of Sealing, Jewels, and the Staff of Jyrik Gaulderson. After he is gone, Tolfdir gives you the next part of the Under Saarthal quest line and "Reforge the Gaulder Amulet" objective appears as well.
Continue out the door marked by the objective arrow. Here is a word wall and chest with some good loot. To the left of the word wall is the exit. In this tight room the handle is on your left to open the gate. Once through the exit back to Skyrim is to the right.
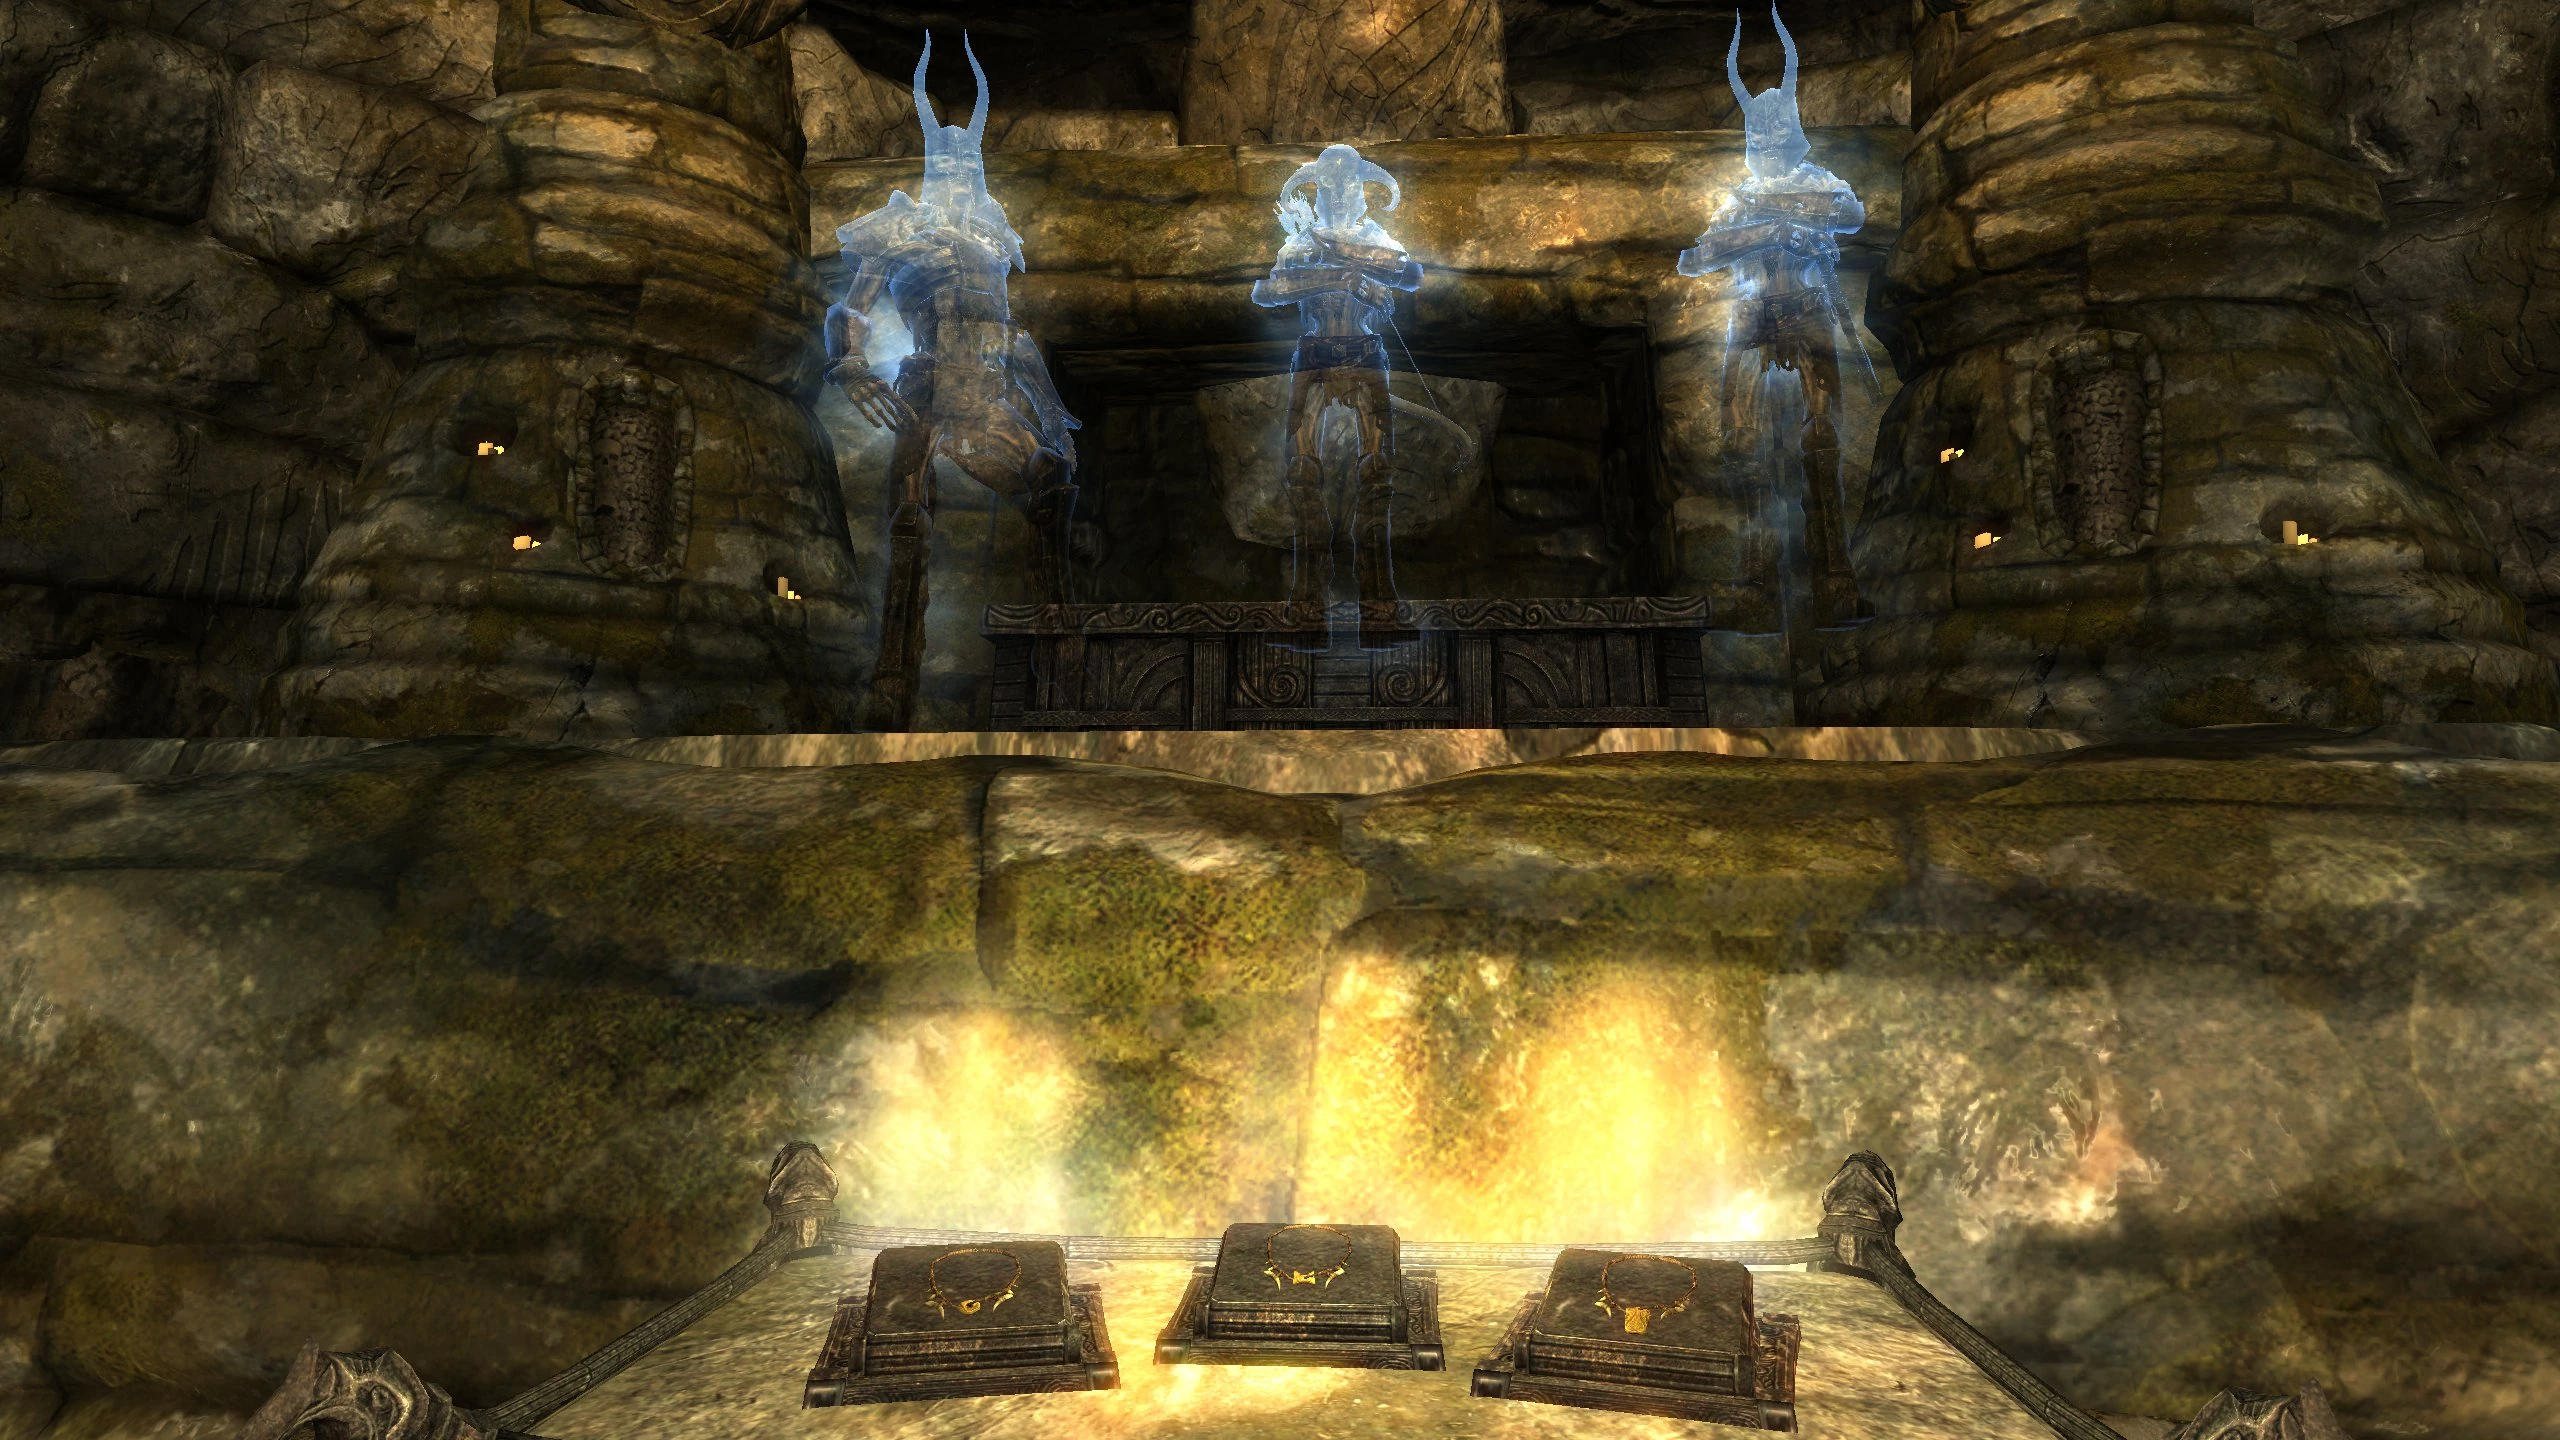
Reforge the Gauldur Amulet[ | ]
Go to Reachwater Rock. There will be an Emerald Dragon Claw. You will need it for the puzzle door. Then the next puzzle door needs the Ivory Dragon Claw's solution. In a large room later on you need to place the amulets. You then need to fight the ghosts of the three Gauldursons. First Mikrul Gauldurson, who has Draugrs with him, who die on his death. Then Sigdis Gauldurson who clones himself. And finally Jyrik Gauldurson again, who simply has a lot of HP. Another ghost will appear who reforges The Gauldur Amulet. Don't forget to check the skeleton of Gauldur, who has a bit of gold.